Soap Making Recipes, Tips & Tutorials
Teach Soap is the premier site for soap making tutorials, soap recipes, soap making tips and everything you’d want to know about making soap and other handcrafted products including lip balms, lotions, bath fizzies and much more.
From beginners to seasoned soap makers, Teach Soap has something for everyone! We cover everything from soap making recipes for beginners, to more complex cold process soap making recipes and techniques.
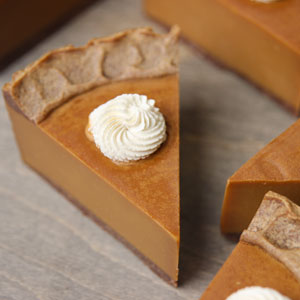
Learn how to make the Pumpkin Pie Cold Process Soap.
Easy Recipes Perfect for Gift Giving
Midas Touch Bath Bombs
 Turn your holiday gift making into a party! These bath bombs are fun to make with friends and perfect for the witches and wizards on your gift giving list.
Using the King’s gold Mica from Bramble Berry, these bath fizzies look like a million dollars. But you can use your favorite color or a combination of micas.
Fall Leaves Melt & Pour Soap
 Make a dazzling handful of guest soaps. View the complete Vermont Maple Tutorial
Guest Leaves Mold
10 oz. Clear Melt and Pour Soap Base
0.2 oz. Vermont Maple Fragrance Oil
0.2 oz. Vanilla Color Stabilizer
Shimmer Sparkle Gold Color Block
Perfect Red Color Block
Perfect Orange Color Block
Yellow Oxide Color Block
99% Isopropyl Alcohol in Spray Bottle
Evergreen Mica
Merlot Sparkle Mica